Tech info pages

Technology information

Tech info pages

Technology information

Tech info pages

Technology information

Tech info pages

Technology information

Tech info pages

Technology information

tech info pages

Sunday, December 2, 2012

How to Create User Account Password in Windows 7 Ultimate


Step by step procedure to create a password for User Account in Windows 7: User account password can be created in different ways by using control panel applet method and computer management console method. In this article we are describing you about how to create a User Account password in Windows 7 by using control panel applet method.

Procedure to Create User Account Password in Windows 7:


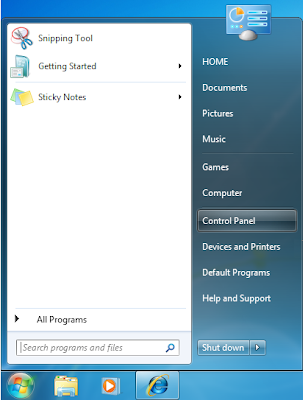
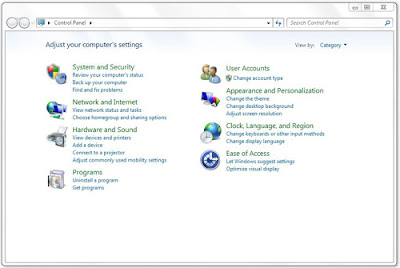
Step 1: Go to “Start” menu and click on “Control Panel”.


Creating password for a User Account Start menu


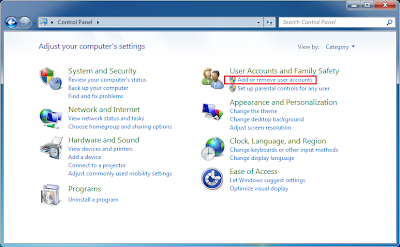
Step 2: In Control Panel So many options will be displayed. In that select “Add or remove user accounts” under the option “User Accounts and Family Safety”.


Creating password for a User Account Control Panel

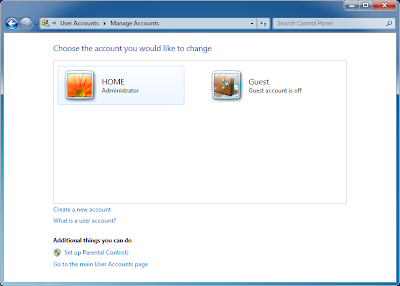
Step 3: Select the account you would like to change or for which you want to create password.


Creating password for a User Account Manage Accounts

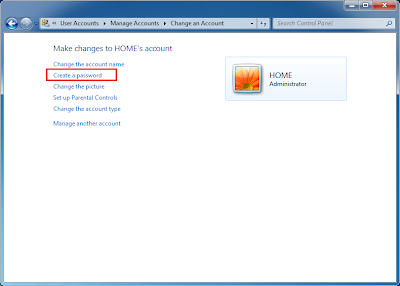
Step 4: In the next step select “Create a password” from the given options in ‘Change an Account page'.


Creating password for a User Account Change an Account

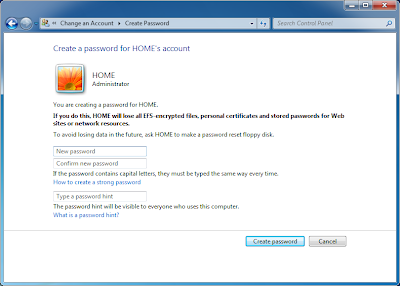
Step 5: Enter the password which you want to set for a User Account and it should be strong.


Creating password for a User Account create password page

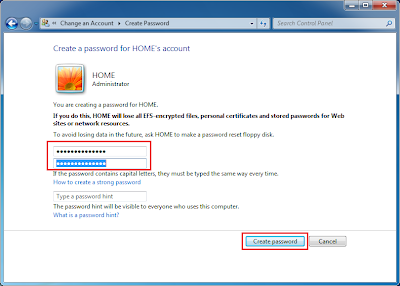
Step 6: Confirm the password again. Then click on the button “Create Password”. It is very useful to type a password hint for those who forget password. So that you will get an idea from pass word hint. 


Creating password for a User Account Create password

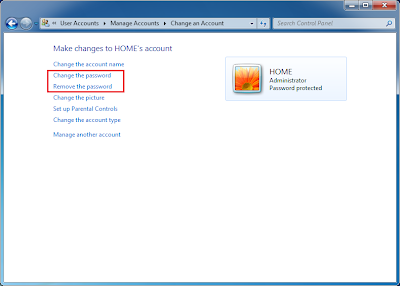
Step 7: After completion of creating password “Change an Account page” will be opened and the option “Create password” will be replaced with “Change password” & “Remove password”.

Creating password for a User Account change or remove password

This concludes your process. Now your account will be protected with the password. When you restart or log on to your account it will ask for password.  


Saturday, December 1, 2012

How to install Internet Information Services IIS in Windows 7 Ultimate


IIS Installation Process: IIS stands for Internet Information Services. Here we are describing about how to install IIS in Windows 7 Ultimate manually step by step procedure. In Windows 7 operating system by default IIS is not installed. Programmer need to install it. Before going to start installation of IIS you must check whether your Windows 7 supports Internet Information Services (IIS) or not. It is an important thing to the developers who are using ASP.NET that is installing IIS(Internet Information Service). In this we have used Windows 7 Ultimate version in which IIS may not come. So we need to install it. 

IIS Installation Process: 

First go to “Start” Menu. Click on “Control Panel” option. The following window will appear.

IIS Installation Process Control Panel

Select the option “Programs” from the list of options.

In the next step of IIS Installation  a window will appear as below shown.
IIS Installation Process Programs and Features

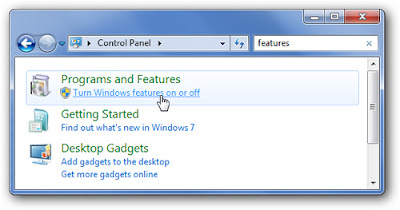
Select the option “Turn Windows features on or off”. You will see a Window as shown in the below image.

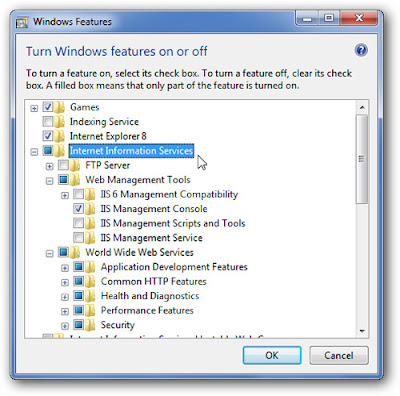
IIS Installation Process Windows Features

Expand Internet Information Services. So many options will be displayed under this Internet Information Services. You need to go through the all these options. Because some of the options may not checked which are necessary for doing development. Check the options you want go ahead and then click on “OK” button.
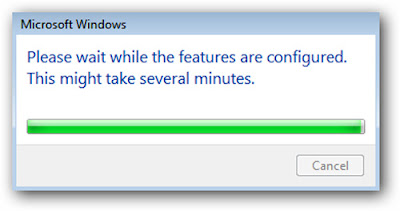
A dialog box will be displayed for a while as shown in the below image.

IIS Installation Process

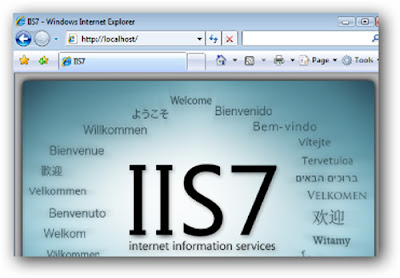
Open your browser and navigate to localhost. A default page will be appeared as shown in the below image.

IIS Installation Process Localhost

This concludes your IIS Installtion process.